
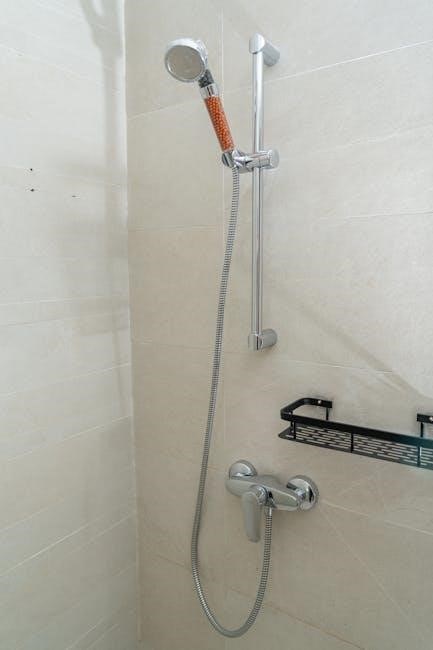
pfister shower valve installation instructions
Pfister shower valves offer a perfect blend of style, functionality, and durability. Proper installation ensures optimal performance, water efficiency, and safety. This guide provides step-by-step instructions for a successful installation process.
1.1 Overview of Pfister Shower Valves
Pfister shower valves are renowned for their durability, water efficiency, and sleek designs. They offer a wide range of models, including pressure-balanced and thermostatic options, catering to diverse needs. The PermaBalance valve is a standout, providing precise temperature control and ease of installation. Pfister valves are constructed with high-quality materials, ensuring long-lasting performance and resistance to corrosion. Their cartridge-based system allows for straightforward maintenance and repairs, making them a favorite among homeowners and professionals alike. With a focus on modern aesthetics, Pfister shower valves seamlessly integrate into any bathroom design, offering both functionality and style. Their commitment to innovation and customer satisfaction has solidified their reputation in the plumbing industry.
1.2 Importance of Proper Installation
Proper installation of a Pfister shower valve is crucial for ensuring optimal performance, safety, and longevity. A well-installed valve prevents leaks, water damage, and potential scalding from temperature fluctuations. It also guarantees efficient water usage and maintains the product’s warranty. Improper installation can lead to premature wear, costly repairs, and even void the manufacturer’s warranty. Additionally, correct installation ensures compliance with safety standards and enhances user satisfaction. By following Pfister’s installation guidelines, homeowners and professionals can achieve a seamless, durable, and visually appealing shower system that functions flawlessly for years. Proper installation also preserves the aesthetic appeal of the bathroom, making it a worthwhile investment in both functionality and resale value.
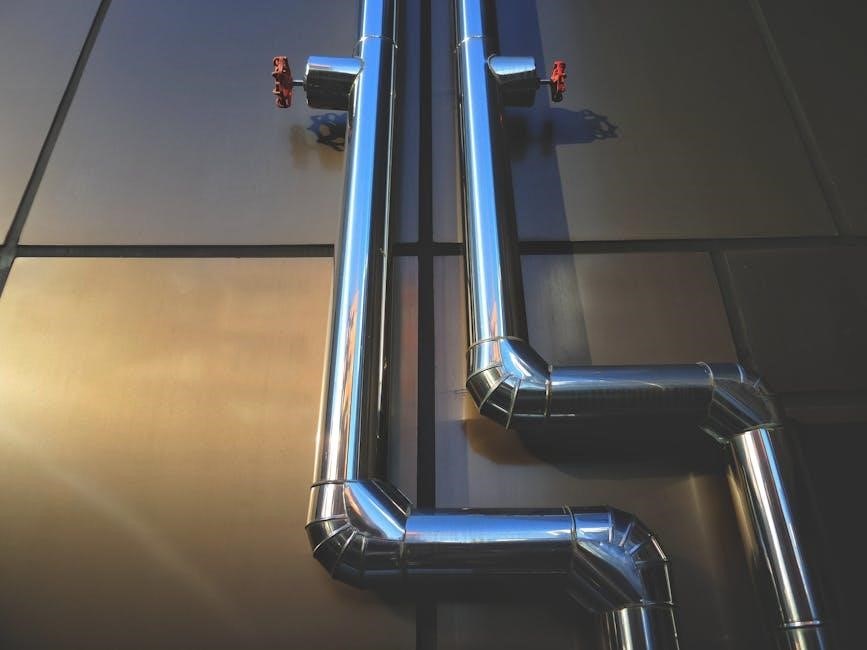
Tools and Materials Needed
Essential tools include an adjustable wrench, pliers, screwdrivers, and a socket wrench. Materials needed are Teflon tape, O-rings, and the Pfister cartridge kit for installation.
2.1 Essential Tools for Installation
Installing a Pfister shower valve requires specific tools to ensure a smooth process. Adjustable wrench or basin wrench is necessary for tightening and loosening connections. Pliers are handy for gripping small parts. A socket wrench and screwdrivers (both Phillips and flathead) are essential for handling various fasteners. Additionally, a drain plug or towel is recommended to prevent losing screws down the drain. These tools are fundamental for proper installation and minimizing potential issues. Always ensure tools are in good condition to avoid stripping or damaging components. Having these tools ready will streamline the installation process and help achieve professional results.
2.2 Required Materials and Components
For a successful Pfister shower valve installation, gather all necessary materials. The rough-in valve is the core component, typically including a pressure balance cartridge for temperature control. Ensure you have the trim kit, which includes the handle and decorative cover. Mounting screws and water supply lines are essential for securing and connecting the valve. Additionally, plumber’s tape or pipe dope is needed for leak-proof connections. If not pre-installed, purchase 1/2-inch NPT connectors for water supply lines. Always verify compatibility with your specific Pfister model and check for any additional components recommended by the manufacturer. Having all materials ready ensures a streamlined installation process and prevents delays.
Pre-Installation Preparation
Pre-installation preparation is crucial for a smooth process. Shut off the water supply, drain the system, and protect the workspace. Remove old fixtures carefully to avoid damage. Ensure all necessary tools and materials are within reach; Placing a drain plug or towel can prevent losing small parts down the drain. Proper preparation saves time and minimizes potential issues during installation.
3.1 Shutting Off Water Supply
Shutting off the water supply is the first critical step in Pfister shower valve installation. Locate the shut-off valves, typically found near the water heater or under the sink. Turn these valves clockwise to stop water flow. Open the shower faucet to drain remaining water from the pipes. Verify that the water supply is completely off by checking the faucet for any residual flow. Properly shutting off the water supply prevents leaks and ensures a safe working environment during installation. Always double-check the valves to confirm they are fully closed before proceeding. This step is essential to avoid water damage or flooding. Place a towel or drain plug to catch any remaining droplets. Ensure the area is dry before starting the installation process.
3.2 Draining the System
After shutting off the water supply, drain the system to prevent water from spilling during installation. Open the shower faucet to allow any remaining water in the pipes to flow out. Place a bucket or towels below to catch residual water. Allow the system to drain completely, as this ensures a dry working environment. For additional safety, consider using a drain plug or covering the drain with a towel to prevent small parts from falling in. Draining the system thoroughly minimizes the risk of water damage and makes the installation process cleaner and more efficient. This step is crucial before disassembling or removing any existing components.
3.3 Protecting the Workspace
Protecting your workspace is essential to avoid damage and ensure a clean installation environment. Cover the shower floor and surrounding areas with drop cloths or plastic sheets to prevent water spots or debris from marring the surface. Use tape to secure these coverings in place. Additionally, protect any nearby fixtures, such as bathtubs or countertops, with plastic or towels. This step helps maintain the appearance of your bathroom and makes cleanup easier after installation. Proper protection also reduces the risk of accidental damage, allowing you to focus on the task at hand without worrying about surrounding surfaces. A well-protected workspace contributes to a smoother and more efficient installation process.
3.4 Removing Old Fixtures
Before installing a new Pfister shower valve, you must remove the old fixtures carefully to avoid damage. Start by shutting off the water supply and draining the system. Remove the handle by taking out the screw or clip holding it in place, then gently pull it off. Next, remove the trim plate or escutcheon by unscrewing it with a screwdriver. Disconnect the water supply lines using an adjustable wrench, taking care not to damage the connections. If the old valve is stuck, use a wrench to carefully loosen and remove it. Place a drain plug or towel in the shower drain to catch any fallen screws or debris. Be gentle to avoid damaging surrounding surfaces or pipes. Proper removal ensures a clean start for the new installation.

Installation Steps
Install the Pfister shower valve by first securing the rough-in valve, then connecting water supply lines, and finally assembling the cartridge, handle, and trim. Follow manufacturer’s instructions carefully for precise alignment and ensure all connections are watertight. Test functionality before finalizing the installation to confirm proper operation and leak-free performance.
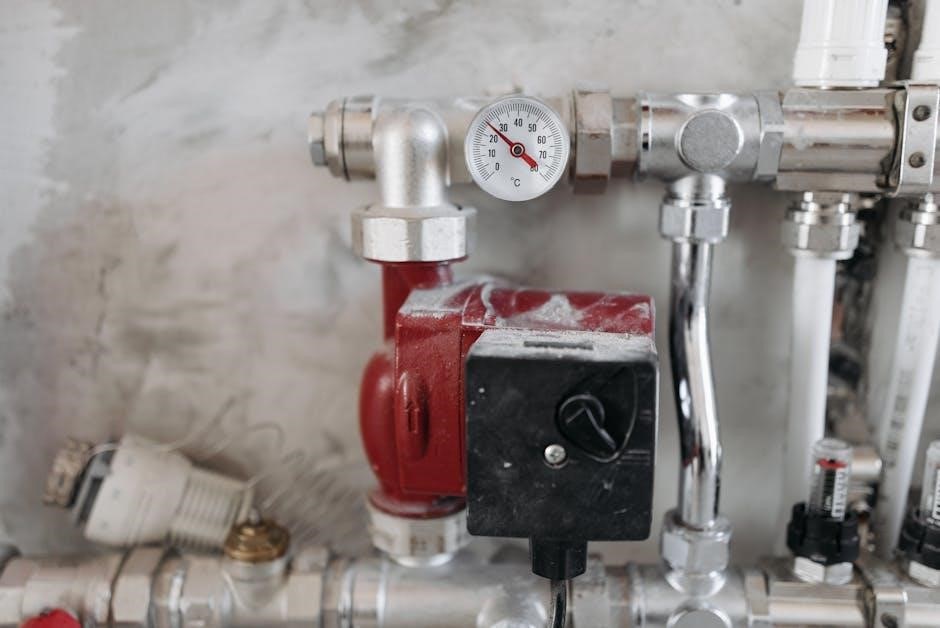
4.1 Rough-In Valve Installation
The rough-in valve installation is the foundational step in setting up your Pfister shower system. Begin by ensuring the valve is correctly positioned in the wall, aligning with the plumbing connections. Secure the valve using the provided mounting bracket or screws, ensuring it is level and plumb. Connect the hot and cold water lines to the corresponding ports, making sure they are properly seated and sealed. Apply Teflon tape or pipe dope to threaded connections for a watertight seal. Once installed, test the valve by gently opening and closing it to ensure smooth operation before proceeding with the next steps.
4.2 Connecting Water Supply Lines
Connecting the water supply lines to the Pfister shower valve requires precision to ensure leak-free performance. Begin by aligning the hot and cold water lines with the valve ports, ensuring they are properly seated. Use Teflon tape or pipe dope on threaded connections to create a watertight seal. Tighten the supply lines securely, but avoid over-tightening, which could damage the valve. Once connected, gently turn on the water supply and inspect all connections for leaks. If any leaks are detected, slightly tighten the connections and test again. Properly connected supply lines are essential for optimal water flow and system functionality.
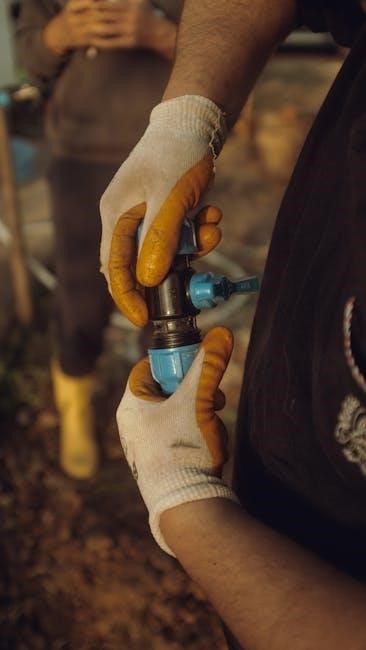
4.3 Installing the Cartridge
Installing the cartridge in your Pfister shower valve is a critical step for proper temperature control and water flow. Begin by aligning the cartridge with the valve housing, ensuring the notches or tabs match up correctly. Gently push the cartridge into the housing until it clicks into place. Use a cartridge puller or wrench if necessary for a secure fit. Once installed, test the cartridge by turning the handle through its full range of motion to ensure smooth operation. Proper installation ensures accurate temperature regulation and prevents leaks or malfunctioning. Always refer to the manufacturer’s instructions for specific cartridge alignment and installation details.
4.4 Assembling the Handle
Assembling the handle is a straightforward process that requires attention to detail. Begin by attaching the handle to the valve stem, ensuring proper alignment with the notches or screw holes. Secure the handle using the provided screws or clips, tightening firmly but avoiding over-tightening, which could damage the stem. Once installed, test the handle’s range of motion to ensure it operates smoothly and evenly. Proper handle assembly is essential for precise temperature control and effortless shower operation. Always follow the manufacturer’s specific instructions for handle alignment and screw torque to guarantee a secure and functional fit.
4.5 Mounting the Trim
Mounting the trim is the final step in completing the visual and functional aspects of your Pfister shower valve installation. Begin by aligning the trim plate with the valve, ensuring it is centered and evenly spaced. Secure the trim using the provided screws, tightening them gently to avoid damaging the finish. Once the trim is in place, check its alignment and ensure it sits flush with the wall. Properly mounted trim not only enhances the aesthetic appeal of your shower but also provides a seamless user experience. Make sure all screws are tightened evenly and the trim is free from any wobbling or misalignment for a professional finish.

Post-Installation Checks
After installation, gradually turn on the water supply and inspect for leaks. Test the temperature adjustment to ensure proper function. Check all connections for tightness and ensure smooth handle operation for optimal performance.
5.1 Turning On the Water Supply
After completing the installation, slowly turn on the water supply to avoid sudden pressure spikes. Start with the cold water, then gradually open the hot water supply. Allow the system to pressurize and check for any initial leaks around connections and fittings. Open the shower valve to ensure proper water flow and temperature mixing. Inspect the entire system under normal operating conditions to confirm everything functions as expected. If no leaks are detected, proceed to test the temperature settings and overall performance of the valve.
5.2 Testing for Leaks
Once the water supply is turned on, thoroughly inspect all connections for leaks. Use a dry cloth to wipe joints and check for water droplets. Run both hot and cold water through the system to ensure proper function. Inspect the cartridge, handles, and trim for any signs of leakage. If a leak is detected, turn off the water supply immediately. Recheck connections, ensuring they are tight but not over-tightened. If leaks persist, verify the cartridge is properly seated and consider resealing or replacing worn components. A leak-free system ensures optimal performance and longevity of the Pfister shower valve.
5.3 Adjusting the Temperature
After ensuring no leaks, adjust the temperature to your preference. Locate the temperature-limit stop on the cartridge, typically accessible after removing the handle. Use an Allen wrench to adjust the stop screw, setting the maximum desired temperature. Turn the screw clockwise to lower the temperature or counterclockwise to increase it. Be cautious not to exceed safe temperatures to avoid scalding. Test the water by running it through the showerhead or faucet. Ensure the temperature remains consistent and comfortable. Proper adjustment ensures safety and comfort, while also meeting local plumbing codes. Refer to the Pfister installation manual for specific guidance on your model.

Troubleshooting Common Issues
Identify and resolve issues promptly to maintain functionality. Common problems include leaks, temperature malfunctions, and handle stiffness. Check connections, clean or replace the cartridge, and ensure proper lubrication. Adjust the temperature-limit stop for consistent water temperature. Refer to Pfister’s troubleshooting guide for model-specific solutions and customer support assistance. Regular maintenance and prompt repairs ensure optimal performance and longevity of the shower valve.
6.1 Addressing Leaks
Leakage is a common issue that can arise from worn-out cartridges, loose connections, or improper installation. To address leaks, start by turning off the water supply and draining the system. Inspect the valve and surrounding areas for visible damage or mineral buildup. Replace the cartridge if it shows signs of wear, and ensure all connections are tightened securely. Use a socket wrench to remove the valve and check for leaks in the O-rings or gaskets. Apply silicone-based lubricant to moving parts for a watertight seal. If leaks persist, refer to Pfister’s troubleshooting guide or contact customer support for assistance. Regular maintenance can prevent future leaks and extend the valve’s lifespan.
6.2 Fixing Cartridge Problems
Cartridge issues can cause temperature fluctuations or water flow irregularities; To fix these, shut off the water supply and access the valve. Remove the handle and trim to expose the cartridge. Inspect for mineral buildup or damage. Clean or replace the cartridge if necessary, ensuring it aligns properly. Reassemble the valve and test the water flow. If problems persist, consult Pfister’s repair kit or contact their support team for guidance. Regular maintenance, like lubricating moving parts, can prevent future issues and ensure smooth operation. Addressing cartridge problems promptly helps maintain optimal performance and extends the valve’s lifespan. Always follow the manufacturer’s instructions for best results.
6.3 Resolving Temperature Issues
Temperature issues with Pfister shower valves often stem from improper cartridge installation or mineral buildup. Ensure the cartridge is correctly aligned and clean. Check the mixed water temperature setting during installation, adjusting as needed. If water temperature fluctuates, inspect the cartridge for wear or debris. Replace the cartridge if damaged. For persistent issues, consult Pfister’s troubleshooting guides or contact customer support. Regular maintenance, such as descaling and lubrication, helps maintain consistent water temperature. Always follow the manufacturer’s instructions for adjustments and replacements to ensure optimal performance and safety. Addressing temperature issues promptly prevents discomfort and potential damage to the valve system. Proper care extends the valve’s lifespan and reliability.

Maintenance and Care
Regular cleaning and lubricating moving parts ensures smooth operation. Inspect for wear and tear, replacing worn components promptly. This maintenance extends the valve’s lifespan and performance.
7.1 Cleaning the Valve
Cleaning the Pfister shower valve is essential for maintaining its functionality and appearance. Use a mild cleaner and a soft cloth to wipe down the valve regularly, avoiding abrasive materials that could scratch the finish. For tougher stains or mineral buildup, mix equal parts water and white vinegar in a spray bottle. Apply the solution, let it sit for 10 minutes, then rinse thoroughly with warm water. Regular cleaning prevents lime scale and grime accumulation. Additionally, wipe the valve weekly with a damp cloth to remove soap scum and water spots. Deep clean annually by disassembling the handle and soaking parts in the vinegar solution. Avoid harsh chemicals, as they may damage the valve’s finish. Regular maintenance ensures optimal performance and longevity.
7.2 Lubricating Moving Parts
Lubricating the moving parts of your Pfister shower valve is crucial for smooth operation and longevity. Use a silicone-based lubricant, as it is water-resistant and ideal for plumbing fixtures. Apply a small amount to the cartridge, O-rings, and any other movable components. Avoid petroleum-based products, as they can degrade rubber and plastic parts. Regular lubrication ensures the valve handles turn effortlessly and prevents corrosion. After lubricating, wipe off any excess with a clean cloth to avoid attracting dirt and mineral buildup. Proper lubrication also helps maintain optimal temperature control and reduces the risk of leaks. Lubricate the valve every 6-12 months or when you notice stiffness in the handle or cartridge movement.
7.3 Inspecting for Wear and Tear
Regularly inspecting your Pfister shower valve for wear and tear ensures long-term performance and prevents costly repairs. Check the cartridge for mineral buildup or corrosion, and inspect O-rings and gaskets for cracks or deterioration. Look for signs of leaks around connections or handles. Ensure the handle aligns properly with the cartridge and moves smoothly. Inspect the valve’s finish for tarnish or damage. Use a flashlight to examine hard-to-reach areas. Address any issues promptly to maintain water efficiency and prevent further damage. Replace worn parts with genuine Pfister components to ensure compatibility and longevity. Regular inspections help maintain optimal function and extend the lifespan of your shower valve. Schedule checks every 6-12 months for best results.
Manufacturer’s Instructions and Resources
Refer to Pfister’s official installation guides and instructional videos for detailed steps. Contact their customer support for assistance. Visit their website forupdated resources and troubleshooting tips.
8.1 Pfister Installation Videos
Pfister provides comprehensive installation videos to guide users through the process. These videos cover various faucet and shower valve models, ensuring clarity and precision. Detailed step-by-step instructions are included. They demonstrate proper techniques for rough-in valve installation, cartridge replacement, and trim assembly. Professionals and DIYers benefit from visual demonstrations. The videos are accessible on Pfister’s official website and YouTube channel. Watching these videos helps avoid common mistakes and ensures a smooth installation. They also highlight essential tools and materials needed. By following the videos, users can achieve professional-quality results. Regular updates ensure the latest models are covered. These resources are invaluable for both experienced installers and newcomers.
8.2 Customer Support Contact
Pfister offers exceptional customer support to assist with any installation or product-related queries. Their dedicated team is available to provide guidance and resolve issues promptly. Customers can reach out via phone, email, or live chat for personalized assistance. The support team operates Monday through Friday, ensuring help is available during standard business hours. For convenience, Pfister also provides a contact form on their official website. Whether you’re a professional installer or a homeowner, their customer service ensures a seamless experience. Visit their website for detailed contact information and additional resources, including FAQs and downloadable guides. Pfister’s commitment to customer satisfaction makes troubleshooting easier and ensures long-term product performance.
Tips for Professionals and DIYers
Professionals and DIYers can achieve a seamless installation by following Pfister’s detailed instructions and using recommended tools. Proper preparation and alignment ensure a flawless, leak-free setup every time.
9.1 Best Practices for Plumbers
Plumbers should thoroughly review Pfister’s installation manuals to ensure compliance with specific requirements. Proper alignment of the valve and cartridge is crucial for optimal performance. Using a plumber’s socket wrench can simplify the removal and installation of components. Ensuring all connections are watertight will prevent future leaks. Additionally, testing the system under pressure before finalizing the setup is recommended. Following these best practices not only ensures a professional finish but also extends the lifespan of the shower valve, providing long-term customer satisfaction.
9.2 Advice for Homeowners
Homeowners undertaking a Pfister shower valve installation should begin by thoroughly reviewing the manufacturer’s instructions. Turning off the water supply and draining the system beforehand is essential to avoid water damage. Protecting the surrounding area with drop cloths or plastic sheets is recommended to prevent damage to tiles or surfaces. Watching Pfister’s installation videos can provide visual guidance, while measuring carefully ensures proper alignment; DIYers should consider enlisting a second pair of hands for support, especially when handling heavy components. Patience is key, as rushing can lead to errors. Double-checking all connections before restoring water supply helps prevent leaks and ensures a smooth operation. This approach guarantees a professional-grade result for homeowners.
Proper installation and maintenance ensure optimal performance and longevity of your Pfister shower valve. Follow guidelines, utilize resources like customer support, and enjoy a job well done with satisfaction.
10.1 Final Check and Satisfaction
After completing the installation, perform a thorough inspection to ensure all connections are secure and functioning properly. Check for leaks by turning the water supply on and testing each feature of the shower valve. Verify that the temperature control operates smoothly and water flows as expected. Ensure the handle and trim are securely mounted and aligned. Once satisfied, clean the area and test the valve under normal usage conditions. A successful installation enhances bathroom functionality and aesthetics, providing long-term satisfaction. Proper checks ensure reliability and prevent future issues, giving you peace of mind with your new Pfister shower valve.
10.2 Warranty and Future Support
Pfister shower valves are backed by a robust warranty program, ensuring protection against defects in materials and workmanship. The warranty period varies depending on the product and usage, but most cover a significant duration for residential installations. For any issues, Pfister’s dedicated customer support team is available to assist with troubleshooting or repair. Additionally, genuine repair parts are easily accessible through authorized dealers or online platforms. Pfister also provides extensive online resources, including installation videos and user manuals, to help with maintenance and repairs. Registering your product ensures warranty validity and streamlined support. With Pfister, you can trust in reliable after-sales service, reinforcing your confidence in their high-quality shower valves.